One exterior, several decisions
House Rendering Sandbach | Plan the Complete Exterior
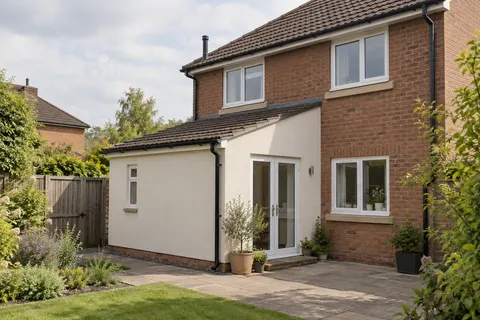
A complete-house project should give the building a coherent finish without treating every surface as identical. The original front, a porch, an extension and a previously repaired side wall can each need different preparation. For house rendering in Sandbach, begin by deciding which parts belong in the work and which features should remain visible. The material choice follows that understanding, rather than deciding the whole job from a colour chart.

On this page
Look at the house as a set of connected surfaces
Walk around the building and identify the changes in construction. A wall may continue visually while its background changes from older brick to blockwork or a later repair. Those transitions can affect the proposed basecoat, reinforcement and movement details. Covering the change with one colour does not remove the junction underneath.
Mark features that should stay exposed: brick plinths, stone surrounds, tile-hung sections or a decorative band. Show how the render will finish beside them. The depth of a new system can change the appearance of a once-prominent feature, so an edge detail is often more useful than a broad instruction to preserve the character of the house.
Smaller additions deserve the same attention as the main elevations. A porch roof may interrupt the wall, and a bay may have several short returns that receive light differently. Include those faces in the scope and establish whether their texture and colour will match the main building or deliberately contrast with it.
- Scaffold and protection Windows, doors, paths and planting are covered; downpipes, lights and satellite brackets come off.
- Old finish tested or removed Failed render is removed; the survey decides whether any sound areas can remain within the specified system.
- Masonry repairs and beads Cracked bricks and open joints are repaired; corner, stop and base beads are fixed.
- Base coats Sand-and-cement scratch and float coats, or a manufacturer basecoat with mesh.
- Finish coat A painted, scraped or thin-coat coloured finish, applied in suitable weather.
- Fittings and junctions Fittings are refixed through the new surface; sills, roofline and abutments are sealed.
The usual order of work. The survey and the chosen products decide the actual steps.
Sort retained material from material that needs removing
Existing render should be assessed for its condition and compatibility with the proposed work. A sound area may be suitable to retain, while loose material or an unsuitable coating may need removal. The assessment needs to explain that decision. Wholesale stripping is not automatically the best route, and a new layer is not automatically a safe shortcut.
Where the house has pebbledash, a trial area can help show how the covering releases and what background repairs might follow. Where isolated failures are visible, the repairs guide explains why the cause matters as much as the patch size. A complete-house quotation should distinguish those operations instead of hiding them inside one general preparation line.
| Surface | Record before pricing |
|---|---|
| Main front | Retained features, openings and agreed finish |
| Side or gable | Existing patches, access and service fittings |
| Rear extension | Construction changes and roof junctions |
| Porch or bay | Small returns, corners and weathering details |
| Unchanged wall | Where new work stops and how the edge is protected |
Choose a system that can be specified fully
A silicone finish is normally the final coat in a defined build-up. A monocouche render has different application and finishing requirements. Both need a suitable background and the correct treatment at openings, edges and construction changes. Ask for the named products and their roles, not just a familiar brand on the quotation.
Traditional masonry may require a different approach, including compatible lime work. Existing sand-and-cement render also needs assessing in relation to the wall beneath it. The visible finish should not be selected in isolation from the materials that support it. Manufacturer guidance and, where needed, specialist advice should explain why the chosen system suits the building.
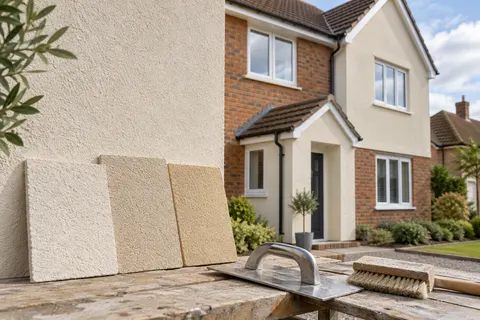
Colour and texture can then be considered together. A small sample should be large enough to reveal the aggregate and finishing pattern. View it beside the retained brick, roof and frames, and check it in more than one light. A colour that looks quiet on a loose chip can appear much stronger across several elevations.
Coordinate the fittings before the wall gets thicker
Downpipes, lights, cables and other fittings may need temporary removal or altered fixings. The quotation should identify who handles each item and whether a specialist trade is required. A neat finish cannot compensate for a pipe left too close to the wall or an important outlet covered by the new build-up.
With external wall insulation, the additional thickness makes coordination more extensive. Sills, eaves, roof abutments and the base of the wall all need suitable details. If insulation is only being considered for one part of the house, establish how it will meet the uninsulated areas. The visual line and the thermal junction are related, but they are not the same question.
Make the working sequence fit the household
An occupied home needs a practical route through the project. Identify the doors used daily, deliveries, pets and any access that cannot be obstructed. Removal work, mixing and waste handling require their own space. The agreed arrangement should keep people away from the work zone rather than relying on everyone to remember where it is.
Roofline or window work may be able to share access, but the sequence must leave each trade a suitable handover. New render should not be completed against a detail that is about to be removed. Discuss those dependencies before choosing dates, along with weather protection and any product-specific curing requirements. A calendar target alone does not establish when a wall is ready for the next coat.
Review the whole exterior at completion
Compare the completed work with the elevation schedule and sample. Look at the boundaries, reinstated fittings and smaller faces as well as the broad areas visible from the road. Record unfinished items separately from defects so that each has a clear action. Photographs are more useful when they show the location and enough surrounding detail to identify it.
Keep the product names, colour reference and maintenance instructions with the house records. They help with later cleaning, alterations or repairs. If your project is actually limited to a single face, the wall rendering page offers a more focused starting point; the Sandbach homepage links the complete set of material and project guides.
Common questions
Does whole-house rendering mean every wall must use the same preparation?
No. Different backgrounds can require different preparation even where the final appearance is consistent. The specification should identify those differences and explain how junctions between them are treated.
Can a porch be left for a later phase?
It can, provided the stopping line and temporary exposed edges are properly resolved. Consider how later work will meet the completed finish and whether colour or texture differences may remain visible.
See housing and planning information for Sandbach and nearby places, including the source and geography behind each figure.