More than the final coat
Silicone Rendering Sandbach | The Finish and the System
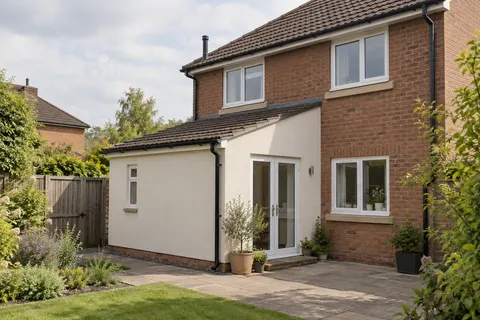
Silicone rendering is often chosen from a photograph of the finished colour and texture. What that photograph cannot show is the background, basecoat and reinforcement beneath it. Those layers decide whether the finish has a suitable foundation. For a Sandbach project, a useful silicone specification identifies the complete build-up and explains how it will meet the existing windows, roof edges and lower wall details.

On this page
Ask what the product name refers to
The name on a quotation may identify the decorative topcoat, a range of products or a complete manufacturer system. Those are not interchangeable descriptions. Ask which product forms each layer and which guidance supports the proposed combination. A familiar finish name does not confirm that the preparation or reinforcement has been included.
Thin-coat silicone finishes are different from a thick levelling coat. They depend on the prepared surface beneath them. If the existing wall is uneven, the quotation should explain how that will be addressed rather than relying on the decorative coat to hide it. The visible texture can disguise neither a poorly aligned base nor an unresolved edge detail.
| Part | What the description should identify |
|---|---|
| Existing background | Material, condition and required preparation |
| Base layer | Named product and relevant thickness or method |
| Reinforcement | System requirements and details at stress points |
| Primer, where specified | Compatibility and application sequence |
| Decorative finish | Exact product, grain and colour reference |
- Sound background A background accepted by the specified system. Keeping old render requires a system-specific assessment of its bond and condition.
- Beads Corner, stop and base beads set the edges and straight lines.
- Basecoat with mesh Glass-fibre mesh embedded in the basecoat resists cracking.
- Primer Where the system requires it, tinted towards the finish colour.
- Silicone finish A thin, through-coloured, water-repellent coat that forms the texture.
Wall on the left, finish on the right. Not to scale: coats, thicknesses and primers follow the chosen manufacturer’s system and the condition of the wall.
Establish whether the old finish can remain
Applying a new system over an existing coating requires more than a quick visual check. The surface must provide the support and compatibility required by the proposed build-up. Loose material, contamination or unsuitable paint may need removal. A test or trial should have a clear purpose and be interpreted in relation to the manufacturer's requirements.
If an old wall has several different patches, identify their boundaries and condition. One patch may be secure while the neighbouring material is not. A continuous topcoat can make the wall look uniform, but it does not make those backgrounds equivalent. The repairs guide covers local defects, while pebbledash removal deals with a rough covering that may need opening up before a specification is settled.
Make the sample represent the actual finish
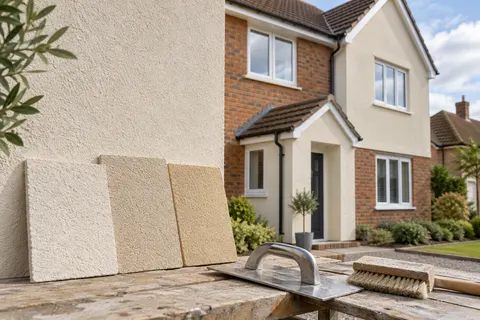
Grain size affects how the surface catches light and how much texture is visible from the pavement. A sample should show the specified product and finishing technique on a suitable background. A printed swatch or screen image is useful for narrowing a colour choice, but it is a poor final reference for texture.
View the sample beside the features that will remain: roof tiles, brickwork, window frames and paving. On a porch or bay, several short faces may receive quite different light. A colour can look darker in a recess and brighter on a projecting face without any difference in the material. Discuss those effects before treating every shade change as an application problem.
Keep the approved colour reference and sample decision with the quotation. If the product changes later, its colour name or code may not produce an identical result. A substitution should be assessed as a new choice, not assumed equivalent because both finishes are described as silicone.
Resolve corners, openings and the wall base
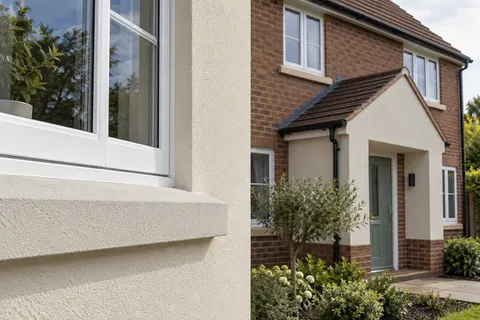
The system needs appropriate details at window and door openings, changes of construction and movement joints. Reinforcement has a defined role within the specification; it is not a promise that a moving building will never crack. Existing movement or recurring defects need assessment before they are covered.
At the base, the finish should terminate in a way that suits the wall and the system. At roof junctions, water should be managed by the appropriate weathering detail. Render is not a substitute for a missing flashing or an inadequate sill. The wall rendering page helps identify these boundaries on a smaller project, and the house guide considers how they connect across several elevations.
Distinguish render-only work from insulation
A silicone finish may be used as part of an external wall insulation system, but the finish itself is not the insulation layer. The thermal design, insulation material, fixings and junctions need their own specification. Do not infer a particular energy improvement from the decorative product name.
Adding insulation also changes the depth of the wall relative to eaves, pipes and openings. A quotation that includes only the visible finish can miss those adaptations. If you are comparing render-only and insulated options, ask for the differences in preparation, build-up and adjoining work to be set out separately. They are different projects even where the final colour appears the same.
Plan application around the product conditions
The manufacturer's limits for temperature, weather and substrate condition should govern application. A dry-looking surface or a favourable afternoon forecast is not enough to establish that all stages can proceed. Protection, drying and curing arrangements need to suit the materials and the exposure of the actual work area.
On a broad face, the finishing sequence should avoid unnecessary stops in the middle of a continuous surface. Smaller returns and adjacent faces also need a planned order. These are practical questions for the application method, not reasons to promise a universal completion time. Ask how the work will be protected if conditions change while a stage is incomplete.
Keep maintenance compatible with the coating
A textured exterior can collect dirt or surface growth. The appropriate cleaning method depends on the product and the cause of the marking. Aggressive pressure or an unsuitable chemical can damage a finish that only needed careful maintenance. Retain the manufacturer's care instructions and the exact product reference.
If the colour is changed later, a compatible respray or coating may be an option after assessment and preparation. If the finish is loose, cracked or affected by a continuing leak, decoration should not be treated as the repair. The Sandbach homepage brings the material, repair and replacement choices together.
Common questions
Does silicone render mean the wall is waterproof?
It describes a finish or system with specific product properties, not a guarantee that every junction or defect is watertight. Sills, roof details, openings and the condition of the background remain important.
Can the decorative coat level a visibly uneven wall?
A thin finish is not a general levelling layer. The proposed base and preparation should address the background to the standard required by the system before the decorative coat is applied.
See housing and planning information for Sandbach and nearby places, including the source and geography behind each figure.