A mineral finish with a defined specification
Monocouche Rendering Sandbach | Colour, Texture and Scope
Monocouche can give an exterior a consistent textured appearance with colour carried through the render. That description is a starting point, not the whole specification. The background, preparation, thickness and finishing sequence still need to suit the named product. On a Sandbach house with bays, a porch or several patched surfaces, those details matter as much as the large areas seen from the road.

On this page
What through-coloured means in practice
The colour is part of the render material rather than being supplied solely by a separate paint film. That can be useful when choosing a textured mineral finish, but it does not mean the surface cannot stain, weather or show a repair. Light, texture and the age of adjoining work all affect what you see.
The word monocouche is often associated with one-coat work. It should not be interpreted as permission to omit preparation or to apply any thickness in one operation. The current product instructions determine the method and any stages needed for the particular background. Ask the quotation to identify the actual product rather than relying on the general term.
- Background Usually blockwork or brick; uneven or mixed walls may need a levelling coat.
- Beads and mesh Beads at corners, reveals and the base; mesh over junctions and lintels.
- Monocouche passes One through-coloured material, applied in passes to the specified thickness.
- Scraped surface Scraped once partly set, which removes the skin and leaves the texture.
Wall on the left, finish on the right. Not to scale: coats, thicknesses and primers follow the chosen manufacturer’s system and the condition of the wall.
A suitable background comes first
New masonry should be ready for rendering in the condition required by the specification. Joints, alignment, contamination and changes of material can all affect preparation. A wall handed over from another trade needs an agreed acceptance point before its defects are concealed. On a refurbishment, the condition of retained coatings needs separate assessment.
Where old render is being removed, establish what the exposed wall needs before the new system begins. The pebbledash removal guide explains why a clean-looking trial patch does not establish the condition of the entire elevation. Existing repairs should also be identified, especially where different materials have been used over time.
Traditional masonry may require a different material approach. Lime rendering should be considered on its own merits where compatible conservation work is needed. A preference for a particular colour or scratched texture should not override the requirements of the wall underneath.
| Starting point | Question to answer |
|---|---|
| New blockwork | Has it reached the required condition and tolerance? |
| Retained render | Is it sound and compatible with the proposed system? |
| Previously painted wall | What preparation or removal is required? |
| Several old patches | Do their materials and adhesion differ? |
| Traditional masonry | Does the proposed render suit the construction? |
Choose the texture using a meaningful sample
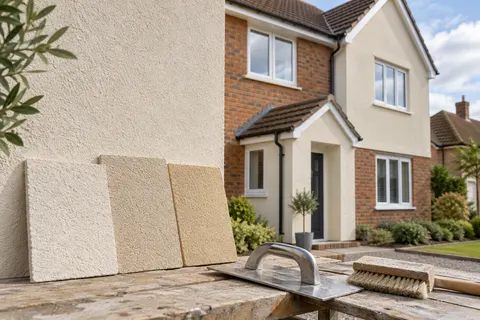
A scratched finish has a different appearance from a smooth or thin-coat textured surface. The aggregate, finishing method and light all influence its character. A sample should show the actual proposed finish, not merely the colour on a small flat card. View it from the distance at which the wall will normally be seen.
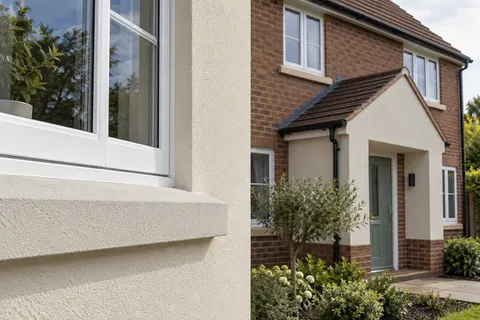
Short angled faces around a bay or porch can make texture more noticeable because each face catches light differently. Consider how the finish will meet smooth frames, brick or stone. A deliberate contrast can work well, but an accidental mismatch at a narrow return can draw attention to a detail that was barely visible before.
Agree the sample before a large elevation is completed. Keep its product and colour reference, and record any accepted variation between new and retained surfaces. That gives the final review a practical basis rather than depending on memory of a brochure image.
Plan uninterrupted faces and stopping points
The application sequence should suit the product and the shape of the wall. A broad elevation needs a plan for completing the finish consistently, including the position of any legitimate breaks. Stopping arbitrarily in the middle of a face can create a visible boundary that is difficult to disguise later.
Movement joints and construction changes require the specified details. They should not be covered merely to produce an unbroken appearance. Reinforcement can be part of the system, but it does not remove the need to understand movement or to retain a necessary joint. The wall guide explains how the perimeter of a limited project can be defined before choosing its finish.
Include the small faces in the price
Window reveals, porch corners and the underside of a projection can involve a substantial share of the finishing work despite contributing little area. A quotation should identify those details and the finish intended on each. Do not assume that every narrow strip receives exactly the same treatment as the broad wall without checking the specification.
Access and protection also remain part of the job. A low extension roof or recently installed paving can affect how materials are handled and how the wall is reached. The costs guide sets out the scope items to compare. For several elevations, house rendering helps organise them into one clear schedule.
Expect repairs to need a visual decision
A small repair in through-coloured render may remain visible because the original surface has weathered or because the texture differs. That does not automatically mean the repair is technically unsound, but the appearance should be discussed before work begins. Matching a colour code alone is not a promise of an invisible patch.
Where a wider colour change is wanted, a compatible coating or respray may be considered after the existing finish has been assessed. That is a separate decorative operation. It cannot make loose render secure or resolve a continuing source of cracking. Compare repair, decoration and replacement as distinct scopes rather than expecting one to achieve all three.
Keep product and care information after completion
Retain the product name, colour, sample record and maintenance guidance. If a future window replacement damages the edge, those details help the repair discussion. They also help prevent an unsuitable cleaning method being used simply because another rendered wall tolerated it.
For a comparison with a thinner decorative finish, see silicone rendering. The choice should reflect the wall and the desired appearance, with the complete specification set out before application. Neither label is a substitute for that work.
Common questions
Is monocouche always applied in one uninterrupted coat?
Follow the instructions for the named product and background. The general name does not remove preparation, required thicknesses or application stages. The quotation should state the actual system and method.
Will a through-coloured finish make later repairs invisible?
No. A repair can differ in texture, age and exposure even when a matching colour is used. Agree the expected appearance and consider the extent of the repair before work starts.
See housing and planning information for Sandbach and nearby places, including the source and geography behind each figure.